
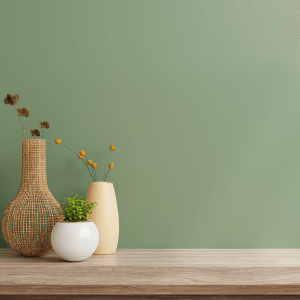
Back-Friendly Storage Solutions
Play The "Storage Solutions" Podcast
🧠 When I Started Moving Differently, My Storage Had to Change
When I began moving through my days with one strong side, I noticed something I hadn’t before: my space wasn’t on my side.
Cabinets that used to be helpful became obstacles.
Reaching into drawers felt like a wrestling match. Lifting storage bins? That wasn’t even an option anymore.
I found myself avoiding certain areas of my home—not because I didn’t want to use them, but because they were built for a body that moved differently than mine does now.
That realization pushed me to get creative. I didn’t want to rely on others for everyday access. I wanted control, comfort, and flow.
These storage solutions helped me get there—and if bending or lifting isn’t part of your routine anymore, they can help you too.
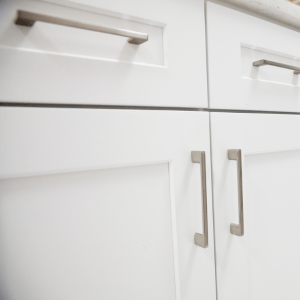
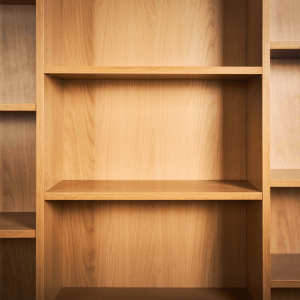
🧺 1. Slide-Out Shelves and Drawer Organizers: Storage That Comes to You
Before I switched to slide-out shelving, I felt like I was always playing a game of Tetris with my cabinets, except instead of fitting pieces together, I was trying not to tip something over while reaching with one hand or leaning awkwardly with my good side.
That kind of strain adds up fast, especially when you're doing it multiple times a day.
🔄 Why Slide-Out Storage Solves the Problem
Most traditional shelves are deep, dark, and impossible to use fully without bending, crouching, or reaching past your comfort zone.
Slide-out shelves fix that by bringing the storage to you. With just a gentle pull, the entire shelf glides outward, making everything visible and accessible from the front edge.
Drawer organizers do the same on a smaller scale.
They stop smaller items from shifting into corners you can’t reach and keep your setup consistent so you're not hunting for things every day.
🧠 Real-Life Ways I've Used Them
Kitchen Cabinets:
I installed sliding trays in my lower kitchen cabinets for mixing bowls, canned goods, and measuring cups.
Now I can roll up in my wheelchair, pull the tray out with my left hand, and grab what I need without leaning or bracing myself.
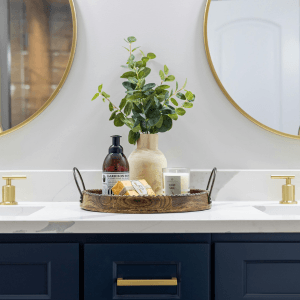
Bathroom Sink:
The cabinet under the sink used to be dead space for me, just a big box of frustration.
Now I have a shallow pull-out tray that holds my toothbrush charger, backup shampoo, and daily supplies. Everything slides out smoothly, and I can use one hand without fear of tipping something over.
Office Drawers:
I added inexpensive drawer dividers to my desk to separate writing tools, sticky notes, and charging cords.
It might sound small, but not having to fumble through clutter makes everyday tasks way more manageable.
Closet Storage:
Instead of using the bottom dresser drawer (which required bending or squatting), I added shallow slide-out trays to my closet shelves.
Now my socks, shorts, and small accessories are all in easy view and arm’s reach.
🛠️ What to Look For
Full-extension glides (lets the entire shelf come out)
Soft-close or low-resistance tracks
Wire baskets with front handles for lower shelves
Drawer dividers with adjustable compartments (especially helpful if you’re only using one hand)
Pro tip: If installing permanent slide-outs isn’t possible, try freestanding pull-out bins or stackable baskets with front-access panels. You’ll get a similar benefit without tools or screws.
📦 2. Clear, Lightweight Bins: No More Guessing or Grabbing Blind
When lifting isn’t an option and bending wears you out, digging through opaque, heavy storage bins becomes one of the worst daily tasks.
You know the drill—lift the lid, peek inside, not find what you need, and then go for the next one. That used to be my routine too.
Once I switched to clear, lightweight storage bins, that entire cycle disappeared. I could see what I needed before touching anything—and choose the bin that wouldn’t strain my body.
🔍 Why Clear and Lightweight Matter So Much
You can see what’s inside at a glance—no need to open and dig.
They’re easier to move—even with one hand or limited grip.
Stacking becomes safer—smaller bins weigh less and are easier to rearrange.
Labeling is easier—but even if you don’t label, visibility helps you locate things fast.
📍 How I Use Them in Different Rooms
Pantry or Food Storage:
Instead of cramming things into one deep cabinet, I divided dry goods into labeled clear bins—“Breakfast,” “Snacks,” “Dinner Add-ons,” and “Extras.”
Shorter bins can be pulled out easily from seated height.
Bathroom Storage:
Under my sink, I keep separate bins for dental supplies, skincare, and backup toiletries.
Instead of bending to dig, I grab the right handle and slide it out like a drawer.
Under my sink, I keep separate bins for dental supplies, skincare, and backup toiletries. Instead of bending to dig, I grab the right handle and slide it out like a drawer.
Fridge and Freezer:
I added clear pull-out fridge bins for drinks, fruit, and leftovers. It keeps the space organized and prevents me from reaching too far into cold shelves.
In the freezer, I use smaller clear bins for frozen meals and produce so I never have to lift a heavy bag or blindly grab a frozen item.
Bedroom or Closet:
I store seasonal clothes in short clear bins stacked on a shelf I can reach. When the seasons change, it’s easy to see what’s inside—and I can grab one bin at a time without any heavy lifting.
Mobility Support Items:
One bin is just for extra wheelchair gear—gloves, spoke reflectors, backup arm pads.
Another holds resistance bands and small workout gear. Because they’re clear, I don’t have to guess what’s where.
🛒 Features to Prioritize
Built-in side handles
Shallow depth (no deeper than your forearm’s reach)
Flip-top or front-flap lids
Lightweight plastic or mesh construction
Optional wheels or under-bed pull tabs for easier movement
Pro tip: Add a pull tab or loop with tape and string if gripping is a challenge.
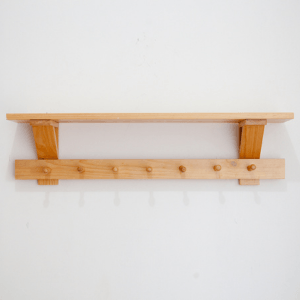
🪑 3. Mount It Where You Move: Better Wall Storage Ideas
When most people hear “maximize vertical storage,” they think tall shelving. But here’s the reality: vertical space should work for your body, not just for your walls.
If it’s above your head or below your knees, it’s not helping, it’s getting in your way.
After I started living with one strong side, I realized I couldn’t just “reach up” or “bend down.” My usable zone shrank, but that didn’t mean I needed less space. It meant I needed smarter space.
That’s where wall-mounted storage changed everything.
🧠 Why Wall Storage Works for Accessible Living
It keeps your floors clear: No tripping hazards, no bulky bins to shuffle around, and plenty of space to turn or roll.
It puts your items in your line of sight: No guesswork, no forgotten bins, no digging.
It’s customizable: You can mount things exactly where your arms move naturally—standing or seated.
Instead of fighting to fit into typical shelving systems, I started customizing my walls to match how I actually move.
🏡 Where I Use Wall Storage in My Home
🚪 Entryway Setup:
This used to be a chaos zone. I’d toss mail on a table, drop my keys wherever, and then spend time hunting them down.
Now I have:
A floating shelf just under the light switch that holds my wallet, phone, and mail
Command hooks for keys, masks, and my grabber
A wall-mounted shoe rack at seated height so I can reach my everyday pair without bending
🧼 Bathroom Setup:
Storing toiletries under the sink was a bad idea for me. Leaning down, opening a small cabinet with one hand, and trying to hold something steady—it just didn’t work.
So I mounted:
A wire caddy at shoulder height next to the mirror for my toothbrush, toothpaste, and face lotion
A mesh organizer on the wall behind the door for backup items
A magnetic strip on the medicine cabinet door for tweezers, nail clippers, and scissors
Everything I use daily? Right there. No leaning, no crouching, no strain.
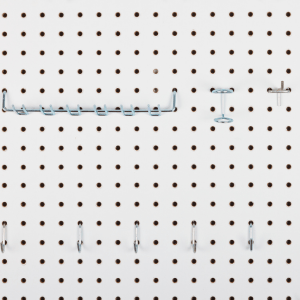
🍳 Kitchen Setup:
Wall space in kitchens is underrated. I had a blank spot near the stove—now it’s one of my most functional zones.
I use:
A pegboard with hooks for utensils and oven mitts
A magnetic knife strip so I’m not reaching into drawers
A wall shelf with small bins for tea, vitamins, and snacks

It’s all mounted at seated height, and nothing’s higher than eye level when I’m in my chair.
🛏️ Bedroom Setup:
This is where I added the most comfort-focused wall storage.
A floating nightstand shelf holds my water, journal, phone, and lotion
Hooks on the wall hold scarves and my bag for quick grab-and-go
A wall file holder stores mail, notepads, and appointment slips—so I don’t pile them on the bed or floor
🛠️ Tools and Products That Make Wall Storage Easy
You don’t need to drill holes or buy expensive systems to make this work. These are the tools I rely on:
Command Hooks and Strips: Great for renters or anyone avoiding tools
Wall-mounted wire baskets: Lightweight and easy to install at seated height
Magnetic bars or strips: For tools, bathroom items, or kitchen utensils
Pegboards with moveable hooks: Perfect for hobby supplies, tools, or adaptive gear
Floating shelves with lips: Keeps items from falling off when bumped or brushed
Bonus Tip: Use a chair or mobility aid when mapping placement. If you install something while standing—but use it while seated—it’ll end up too high.
💡 Accessibility Reminder: Your Reach Zone Matters
Your ideal wall storage zone is between your shoulder and lap height while seated (roughly 24–48 inches from the floor). This keeps you from needing to reach overhead or twist your spine.
Avoid:
Storage above 5 feet
Open shelves mounted over toilets or stoves
Items stored behind doors without clear access
Instead, make every wall-mounted item feel like a shortcut, not an obstacle.

🛋️ 4. Store Essentials at Seated Height: Design Around Your Flow
When your body moves differently, your reach zone becomes everything.
If something is stored above your head or below your knees, it might as well be in another room. That’s not just inconvenient—it’s draining, dangerous, and in some cases, even painful.
After I began doing most tasks with one strong side and from a seated position, I started rethinking where I kept everything I used daily.
Not the extras. Not the seasonal stuff. The everyday essentials—like socks, toothpaste, cookware, chargers, notebooks, and meds.
Turns out, the problem wasn’t that I didn’t have enough storage. The problem was that I was storing things in places that no longer matched how I move.
🧠 Why Seated-Height Storage Matters
When bending, twisting, or lifting isn't part of your daily rhythm, you need storage that lives in your natural reach zone, typically shoulder to lap height while seated (around 24–48 inches from the floor).
Here’s why it’s such a game-changer:
No wasted energy: You’re not stretching, leaning, or making extra trips just to grab a daily-use item.
Reduced risk of strain or injury: No more awkward postures just to reach the back of a low drawer or a high shelf.
Faster routines: When everything is where you can grab it easily, your morning and evening routines become smoother and more predictable.
More independence: The less you rely on someone else to reach, lift, or get something for you, the more control you keep over your day.
This one change alone can transform how you function in your space.
Where I’ve Repositioned My Daily Items (Room by Room)
🛏️ Bedroom:
My most-worn clothes (T-shirts, socks, pajamas) used to be in the bottom dresser drawers.
I moved them to the top two drawers instead. Now I can grab what I need without bending.
I placed a shallow basket on a shelf in my closet for things like gloves, small bags, and my backup charger.
It’s all right at seated height.
My bedtime items like supplements and journal, are stored on a floating shelf beside my bed.
No more trying to lean into a drawer or lift a bin off the floor.
🛁 Bathroom:
Toothbrush, face wash, and medications now live on a mounted wall shelf by the mirror. I can see them and reach them easily—no bending under the sink.
I use a rolling cart (at seated height) with compartments for extra toilet paper, washcloths, and my grooming tools.
🍳 Kitchen:
I cleared out the upper cabinets and now use drawers or mid-height shelves for my daily dishes, cups, and prep tools.
Spices, oils, and snacks live in pull-out bins at counter height or in a rolling cart near the stove.
I mounted a basket for my oven mitts and tea towels on the wall—no drawer-diving required.
🪑 Living Room:
My remotes, headphones, pen, and notepad are stored in an armrest organizer that drapes over the side of my chair.
I use a storage ottoman to keep essentials like grabbers, journals, and extra cables nearby.
A small table with shelves holds my water bottle, hand lotion, and backup battery pack—all within easy reach.
🧰 Tips for Creating Your Seated-Height Setup
Think vertically—but not too high. Ideal range is between 24–48 inches off the ground.
Use trays or shallow bins on shelves so you can pull them out without digging.
Move daily-use items out of low drawers or floor-level storage. Swap locations with less-used items.
Label bins clearly if visibility is limited, especially in closets or bathroom setups.
Use rolling carts or caddies for mobile seated-height access in more than one room.
Bonus Tip:
Before reorganizing, sit in your most commonly used position (wheelchair, chair, or supported stance) and reach out in each direction.
If you can’t reach it without leaning or twisting, it’s too far. Bring the storage to you.
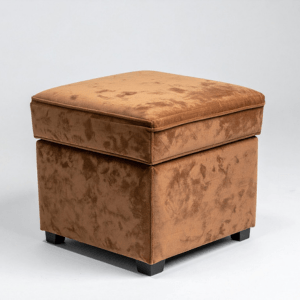
🧰 5. Furniture with Built-In Storage: Easy Access Right Where You Sit
When bending or lifting isn’t in your toolkit, furniture can either be a daily frustration, or one of your biggest allies.
After I adapted to life with limited mobility on one side, I stopped asking, "Where can I store this?" and started asking, "What can store this and support me while I move through my day?"
That’s when I started looking at my furniture not just as places to sit, rest, or sleep, but as functional storage tools that could help me stay organized without reaching, twisting, or relying on someone else.
The best part?
It didn’t mean adding more furniture. It meant choosing smarter pieces that worked double-duty, giving me access to what I needed, right where I already was.
🧠 Why Built-In Storage Furniture Works So Well
It eliminates extra movement: No need to roll across the room or get up just to grab the basics.
It reduces clutter and keeps essentials close: You’ll stop piling stuff around your space when your furniture actually holds what you use.
It saves energy and time: Daily-use items are stored where you spend the most time—seated, lounging, or sleeping.
It respects your body’s limits: You’re not leaning into deep bins or opening heavy drawers.
This type of storage puts control, comfort, and convenience at the center of your living space.
🏡 My Real-Life Setups: How I Use Furniture to Store Smarter
🛋️ In the Living Room:
Storage Ottoman: This is my go-to. It holds my grabber, extra socks, hand weights, and backup charging cable.
It’s sturdy enough to support me during transfers, soft enough to rest my legs on, and light enough to slide out of the way when needed.
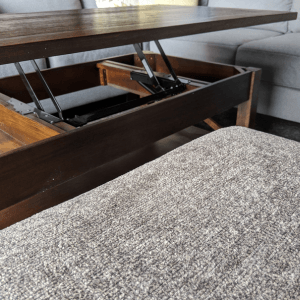
Lift-Top Coffee Table: Total game changer. The top lifts and swings toward me, becoming a desk for eating, writing, or working on my laptop.
Underneath, I store my remote, notebook, glasses, and a small LED lamp.
Armrest Organizer: This hangs over the arm of my recliner and has multiple slots for everything I use daily, TV remote, pen, notepad, lip balm, and a snack (or two).
No reaching, no searching.
🛏️ In the Bedroom:
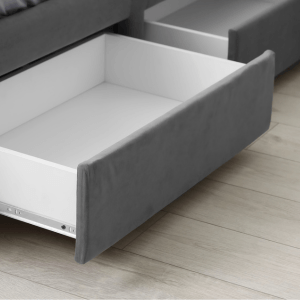
Storage Bed Frame: Mine has deep drawers on the side where I store pajamas, slippers, seasonal clothes, and extra bedding. I can open it with one hand and access everything from a seated position on the bed.
Bedside Caddy: This slides between the mattress and box spring and holds my journal, phone, water bottle, and eye mask. No nightstand drawers to open. No leaning over.
🧼 In the Bathroom:
Bench with Storage: I added a wooden bench with a flip-top lid. Inside I store backup toiletries, first-aid items, and a few comfort items like heated packs and essential oils.
I sit here while dressing or getting ready, and I never have to bend down to a floor cabinet again.
🖥️ In the Office/Work Area:
Rolling Storage Cart with Flat Surface: I keep office supplies in drawers underneath and use the top as a writing surface. It’s mobile, compact, and doesn’t require any lifting to use effectively.
Compact Side Table with Open Shelves: This sits beside my desk chair and holds adaptive tools, cords, snacks, and my taco-shaped stress ball.
🛒 What to Look For When Choosing Storage-Friendly Furniture
Sturdy, low-profile designs: They should support body weight or transfers if needed.
Easy-open lids or drawers: Look for soft-close hinges, lightweight tops, or pull tabs.
No sharp corners or tight compartments: Rounded edges and open shelves are easier to navigate with one hand.
Accessible while seated: Avoid furniture that requires crouching, twisting, or standing to use.
Bonus Tip: Go room by room and ask yourself, “Is this piece of furniture helping me store what I need, or making me work harder for it?”
If it’s not helping, it might be time to swap it out for something smarter.
🪑 Multi-Function = More Freedom
Once I embraced furniture that stores what I need, and does it without asking me to bend, grip, or lift, I felt a big shift in my day. Less scrambling. Less discomfort. More peace.
When your space is working with your body, you don’t just feel more organized, you feel more in control.
And that’s what these small furniture swaps are all about: giving you freedom right where you sit, sleep, or relax.
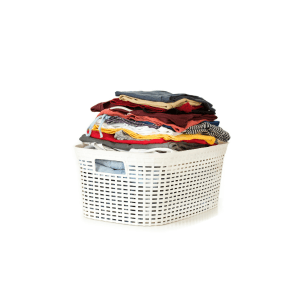
🧺 6. Tilt-Out Hampers and Accessible Bins: Less Lifting, More Flow
Before I reworked my laundry setup, laundry day felt like a full-body workout I didn’t ask for.
Picking up heavy hampers, dragging bags to the washroom, wrestling with lids, all of it drained my energy before the real chore even began.
When bending isn’t in the cards and lifting feels like a gamble, tilt-out hampers and accessible bins change the game completely.
These tools are more than just helpful, they’re essential for keeping daily routines manageable, especially when you want to stay independent without putting your body at risk.
🧠 Why Traditional Hampers and Trash Bins Don't Work for Everyone
If you’ve ever tried to:
Lift a full hamper with one hand,
Pop open a trash can lid with limited grip strength,
Or bend to pick up laundry from the floor...

...you already know how exhausting and frustrating those “normal” storage tools can be.
Here’s the issue: most bins are designed around standing bodies with two hands and full range of motion. If that’s not your reality, those same tools become barriers., They slow you down, wear you out, or worse, put you at risk of losing balance or straining your back.
That’s why I made the switch to tilt-access designs, and I’ll never go back.
🧺 Tilt-Out Hampers: Laundry Made Accessible
Tilt-out hampers are exactly what they sound like: instead of lifting the lid or dragging a bag up, you pull the hamper forward from the front. It pivots toward you, making it easy to toss items in and pull them out without bending or grabbing awkwardly.
🏡 Where I Use Them:
In the bedroom, I use a bench-style tilt-out hamper with a soft-close lid. It holds enough for a few days of laundry and doubles as a seat while dressing.
In the bathroom, I’ve placed a narrow tilt-out bin in the corner for towels and clothes. It’s compact and easy to access from a wheelchair or seated perch.
In the laundry room, I use a tilt-out cart with wheels so I can roll it right up to the washer without lifting anything.
💡 Extra Features to Look For:
Built-in handles inside the tilt-out drawer
Soft-close mechanisms to avoid slamming
Lightweight plastic inserts that are easy to pull out and carry when needed
Locking wheels for added mobility and stability
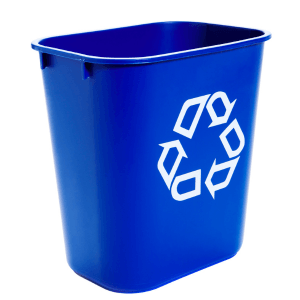
🗑️ Accessible Trash and Recycling Bins
Bending down to lift a trash can lid is a no-go in my home. That’s why every bin I use now is either foot-operated, front-access, or touch-free.
These kinds of bins make one of the most repetitive household tasks smoother and safer, especially in kitchens and bathrooms where balance can already be tricky.
🚮 My Setup:
Kitchen trash bin: I use a foot-pedal model with a wide front opening. I can roll right up and press it with the edge of my chair footplate if needed.
Bathroom bin: Small, no-lid model placed at seated height so I can drop tissues or wrappers in without leaning forward.
Recycling station: I’ve set up a tilt-out triple bin system (glass, plastic, paper). Each section is front-loading so I can access it without touching the floor or dealing with bags.
Desk area: Mini swing-top waste bin that sits on the table itself—no need to drop things over the side or scoot across the room.
🛒 Bonus Features to Look For:
Sensor-activated lids (battery-powered, no touch required)
Flip-top or swing-lid styles with minimal resistance
Removable liner buckets for easier cleanup
Wide bases that don’t tip when pressed or leaned on
🧼 Rolling and Bag-Free Options
If even tilt-out feels bulky for your space, you’ve still got options. I also use:
Open-top rolling laundry baskets with side handles I can guide with one hand
Bagless recycling bins that I can slide into position without lifting
Hampers with side zippers so I can open them while seated and pull items out without digging from the top
These tools don’t just reduce physical strain—they eliminate unnecessary effort from everyday life.
✅ Why This Matters
After I realized that ease, safety, and joy were non-negotiable, I stopped struggling with tools that weren’t designed for bodies like mine.
Switching to tilt-out and front-access bins didn’t just improve my laundry or trash routine—it gave me back the energy I used to spend fighting with bad design.
Because the real goal of accessible storage isn’t just function—it’s flow. The kind that fits your life, not fights it.
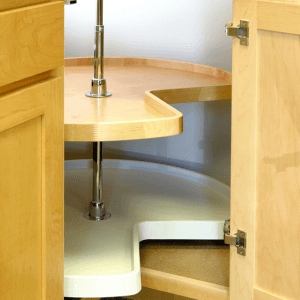
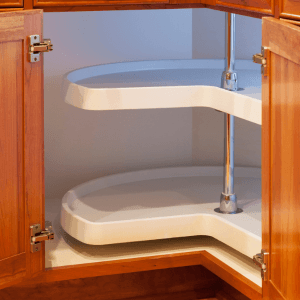
🔄 7. Lazy Susans: Spin Instead of Strain
There was a time when I stopped using anything stored in the back of my cabinets—not because I didn’t want the items, but because getting to them meant wrestling with my body.
Reaching past heavy jars, knocking things over, trying to grab one thing without pulling everything else down… it just wasn’t worth it.
Then I found Lazy Susans—and everything changed.
These turntable-style organizers take hard-to-reach storage and turn it into a single smooth movement. No reaching, no twisting, no tipping required.
Whether you use one arm, roll up seated, or just need access without effort, a Lazy Susan puts the entire shelf in motion for you.
🧠 Why Lazy Susans Make Life Easier
Lazy Susans aren’t new, but they are wildly underused in accessible living.
Most people think of them as kitchen gadgets, but they’re actually one of the smartest no-bend, no-lift tools you can add to any room.
Here’s why they’re perfect when bending or lifting isn’t an option:
They eliminate the need to reach to the back of cabinets or shelves.
You can access everything with a gentle turn, even using just one hand.
They reduce the risk of spills and strain, especially when dealing with glass or awkward containers.
They’re compact, versatile, and affordable.
For me, it was like upgrading from frustration to flow overnight.
📍 Where I Use Lazy Susans Around My Home
🍳 Kitchen Cabinets:
I placed a large Lazy Susan in the deep corner cabinet that used to be useless to me. Now, all my oils, sauces, and seasonings live there, grouped together by use. One spin and I have everything I need, without knocking anything over.
In the pantry, I use two smaller ones for baking ingredients and canned goods. Before this, I had to dig or slide heavy cans to find what I needed. Now, I just rotate and grab.
🧼 Bathroom Counter & Shelves:
I added a small Lazy Susan on my bathroom shelf for lotions, razors, skincare, and deodorant. No more opening three drawers just to find what I use every morning.
There’s also one in the medicine cabinet for prescription bottles, cotton swabs, and face wipes. I can see everything at once and don’t have to pick up or move items around.
🛏️ Bedroom Dresser or Side Table:
On top of my dresser, I have one with my daily supplements, a hairbrush, and a small dish for earplugs.
On my bedside shelf, another holds my water bottle, sleep balm, and a pen. I spin it toward me from bed without reaching awkwardly.
🎨 Craft or Desk Area:
I use a divided Lazy Susan on my rolling cart for pens, scissors, adhesive, and small craft supplies. It’s especially helpful when you only have one good hand or limited arm movement.
A larger one holds envelopes, notebooks, sticky notes, and even a small LED light. Everything’s organized, and nothing slides out of view.
🚪 Entryway Drop Zone:
I placed a small Lazy Susan on a wall-mounted shelf for keys, chapstick, fobs, and spare cash. Instead of cluttered bowls or trays, I can spin to what I need without shuffling.
🛒 What to Look for When Choosing One
Not all Lazy Susans are created equal. Here’s what I recommend for anyone with limited mobility or one-sided use:
High-lipped edges: Prevents items from falling off when you spin it.
Non-slip surface: Keeps bottles and jars from sliding.
Smooth-turn mechanism: You should be able to rotate it with one finger.
Dividers or compartments: Helps separate items by type so they don’t all mix together.
Two-tiered models: Useful if you have vertical space and can reach both levels from a seated position.
Material: Choose plastic or bamboo for lighter weight—metal ones tend to be heavier and harder to spin with one hand.
Pro Tip:
For items like pill bottles or spice jars, label the tops so you can see what’s what at a glance when looking down. That way, you’re not bending forward or twisting jars to read them.
🧩 DIY Alternative: Make Your Own
If you can’t find one that fits your space, here’s a trick:
Take a round baking tray or plate
Place a set of smooth marbles or a rotating disc base underneath
Add a non-slip liner or small bins on top
Boom—DIY Lazy Susan, accessible and personalized to your reach.
✅ What Lazy Susans Actually Gave Me
Once I started designing for how I move now, not how I used to, my routines got smoother, and my space more peaceful.
Lazy Susans took something frustrating, storage I couldn’t use, and turned it into smooth, stress-free access.
Now, I use more of my space. I do more for myself. And I’ve reclaimed the flow I thought I had to give up.
If bending and lifting are off the table, spinning into reach might just be your new favorite move.
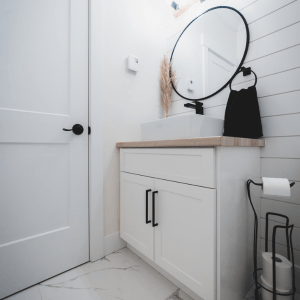
🧼 8. Mount Essentials Where You Can See and Reach Them
One of the biggest shifts I made after I started living with limited mobility on one side was realizing that if I couldn’t see it, I probably wouldn’t use it, or I’d waste energy trying to find it.
The problem wasn’t just about remembering where I put things. It was about the physical act of getting to them.
So I changed the way I thought about storage altogether.
Instead of hiding items in drawers, bins, or out-of-reach shelves, I started mounting them in plain sight;
right where I already move, sit, or reach every day.
This simple shift saved time, reduced effort, and made my daily routine a whole lot smoother.
🧠 Why Visibility + Accessibility = Function
Mounting items at a usable height isn’t just about organizing, it’s about removing barriers from your everyday life.
Here’s what this approach solves:
No more bending to open drawers or reach under sinks
No more guessing where things are or digging through clutter
No more overextending your arms or twisting your spine to grab something
No more relying on someone else just to reach a basic item
When your essentials are mounted at eye or seated level, you're not just organizing—you’re giving yourself permission to move through your day with less resistance.
🛏️ Where I Mounted Items (Room by Room)
🛁 Bathroom:
I used to store my toothbrush, toothpaste, and hairbrush under the sink. Now they live in a wall-mounted caddy right next to the mirror, perfect height for seated use.
I mounted a stick-on corner shelf in the shower to hold body wash, shampoo, and a loofah. Everything is at elbow height when I’m seated, so I never need to reach down or fumble with slippery bottles.
There’s also a magnetic strip inside the medicine cabinet door that holds nail clippers, tweezers, and grooming scissors—items that used to get lost in drawers.
🛏️ Bedroom:
I installed a small floating shelf beside my bed. On it: my water bottle, eye drops, lotion, journal, and charging cable, all within easy reach.
I mounted a vertical organizer on the inside of my closet door to hold scarves, extra socks, and accessories. Now I can roll up or stand with support and grab what I need without bending.
A mounted pouch near the bed holds my remote, flashlight, and backup phone charger, so I’m never stuck or searching when I need something at night.
🍳 Kitchen:
I attached a wall-mounted spice rack to the inside of my pantry door, exactly at seated height. I used to store spices in an upper cabinet I could barely see into—now I just roll up and pick what I need.
Magnetic strips by the stove hold my most-used utensils and a pair of adaptive cooking shears. They’re easy to grab with one hand and don't take up drawer space.
I mounted a fold-out towel bar at reachable height below the counter so I could grab a clean towel without opening a drawer.
🚪 Entryway:
I added a floating shelf below the light switch to act as a landing zone. It holds my wallet, keys, and headphones so I’m not fishing around in a bowl or dropping things on the floor.
A mounted hook holds my daily-use bag, and another hook holds a grabber—just in case I drop anything on the way out.
🖥️ Desk or Work Area:
My most-used office tools—scissors, tape, notepads, pens—are all mounted on a pegboard right next to my workspace.
A mounted bin under the desk holds charging cables and small electronics, so I’m not crawling around trying to untangle cords.
🛠️ Easy Tools for Mounting Without Drilling
Whether you rent or just don’t want to use power tools, here are low-effort, high-impact tools that work for mounting your essentials:
Command strips/hooks: Strong enough for baskets, bags, towels, keys, and lightweight bins
Magnetic strips: Ideal for tools, scissors, grooming items, or utensils
Peel-and-stick caddies: Great in bathrooms, kitchens, and next to beds or desks
Pegboards with adjustable hooks: Fully customizable, especially helpful for grouping small daily-use items
Velcro or loop tape: Works well for remotes, pens, or medical tools that you want secured but removable
Fold-down organizers: Mounted at seated height, these are great for mail, notebooks, or schedules
Pro Tip: Always measure while sitting in your most-used position. If you install something while standing, it may be too high once you sit down.
🧠 Accessibility Reminder: Keep It in the Gold Zone
When you’re seated, your optimal reach is typically:
24–48 inches from the floor (hip to shoulder height)
Within arm’s reach from your primary movement zone (bed, toilet, sink, desk, etc.)
Avoid:
Mounting items over 5 feet high
Placing daily-use objects behind doors or in tight corners
Hanging things that require both hands to retrieve or lift
Instead, focus on front-facing access, clear visibility, and minimal reach effort.
✅ What This Change Gave Me
When I stopped waiting to recover and started choosing to live, I realized my routines weren’t the problem—my setup was.
Mounting my essentials where I could see and reach them gave me:
More freedom in every room
Faster, smoother mornings
Fewer dropped items
And less stress at the end of the day
And that’s the kind of upgrade I’ll always say yes to.
I Made A Little Something For You...
Back-Friendly Storage Solutions

© HomeFlexion.com